Transcript:
Click on Staff in the side menu. Then click on Add Staff on the top right. Enter the first and last name of the staff, email address, as well as phone number. If any of this is not available, leave it blank. The Description field is internal only. The information you enter here will not be shown to users who make a booking. The Image field lets you add an image of the staff. This image will be shown to users when making a booking.
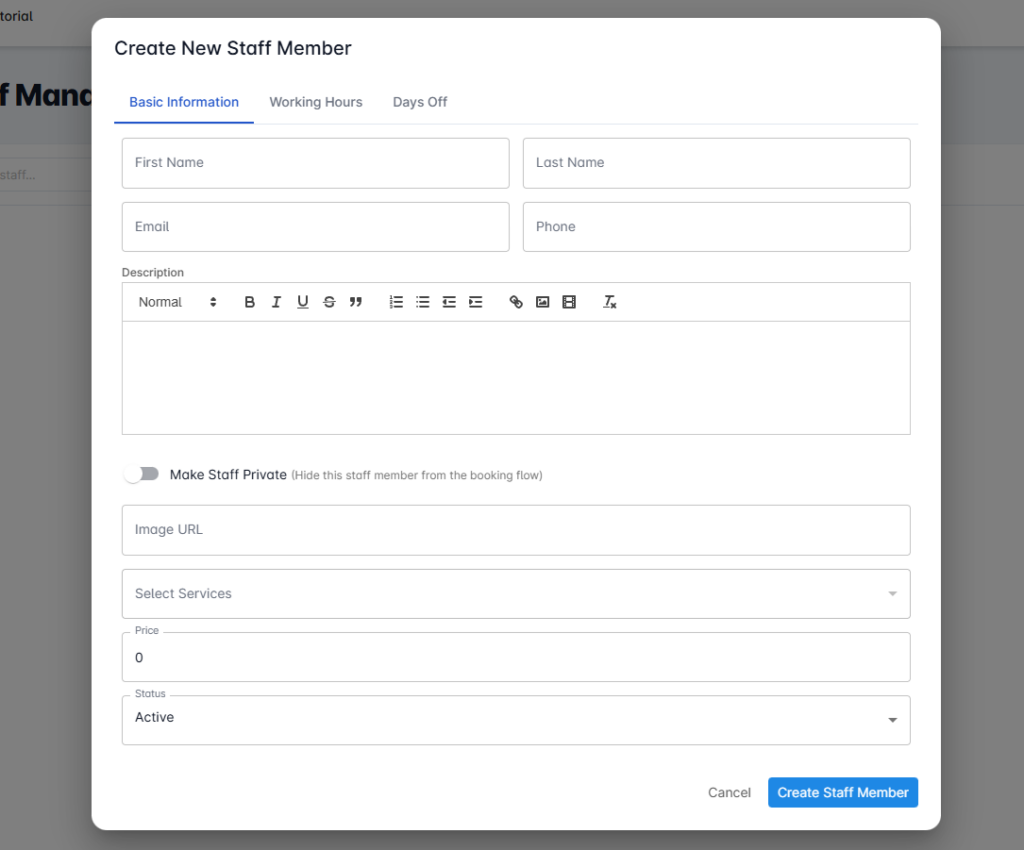
In the Branch drop-down menu, you add all branches where this staff provides services at. In the drop-down, you will find all branches that have been added to Fox Connect previously. You are also able to select multiple branches here. In the Select Services drop-down menu, you can assign any service that this staff is providing and can be booked for. You can select a single or multiple services here. This part is very important, as only if you select a service here, will this staff show up to users during the booking process.
Let’s move to the Working Hours tab. As usual, you set up the working times for this specific staff here. Note that the time entered here overwrites any general working hours that you have already set up for your business in the Booking settings. This allows you to assign customized working hours for each staff. Working Hours will decide what time slots are shown to users for this staff when they make a booking. The Days Off tab lets you add specific days off or holidays for this specific staff.
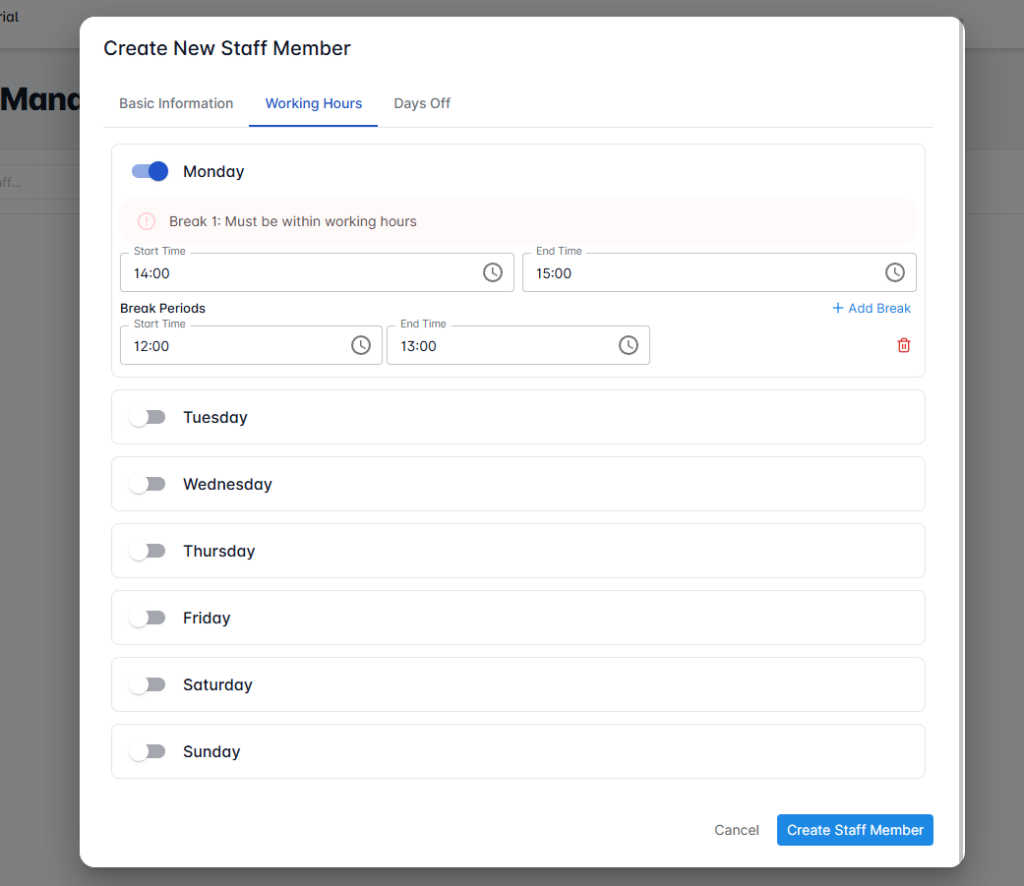
Note that anything entered here is on top of the days off you have added it all ready for your business as a whole. After After saving, you can now see your first staff listed in Fox Connect. Click here to view the Details page. It shows you each staff’s details, what services they provide, and at what branches. Once this person receives any bookings, they will be listed on the calendar on this page, as well as on the main calendar in Fox Connect.
Related Tutorials